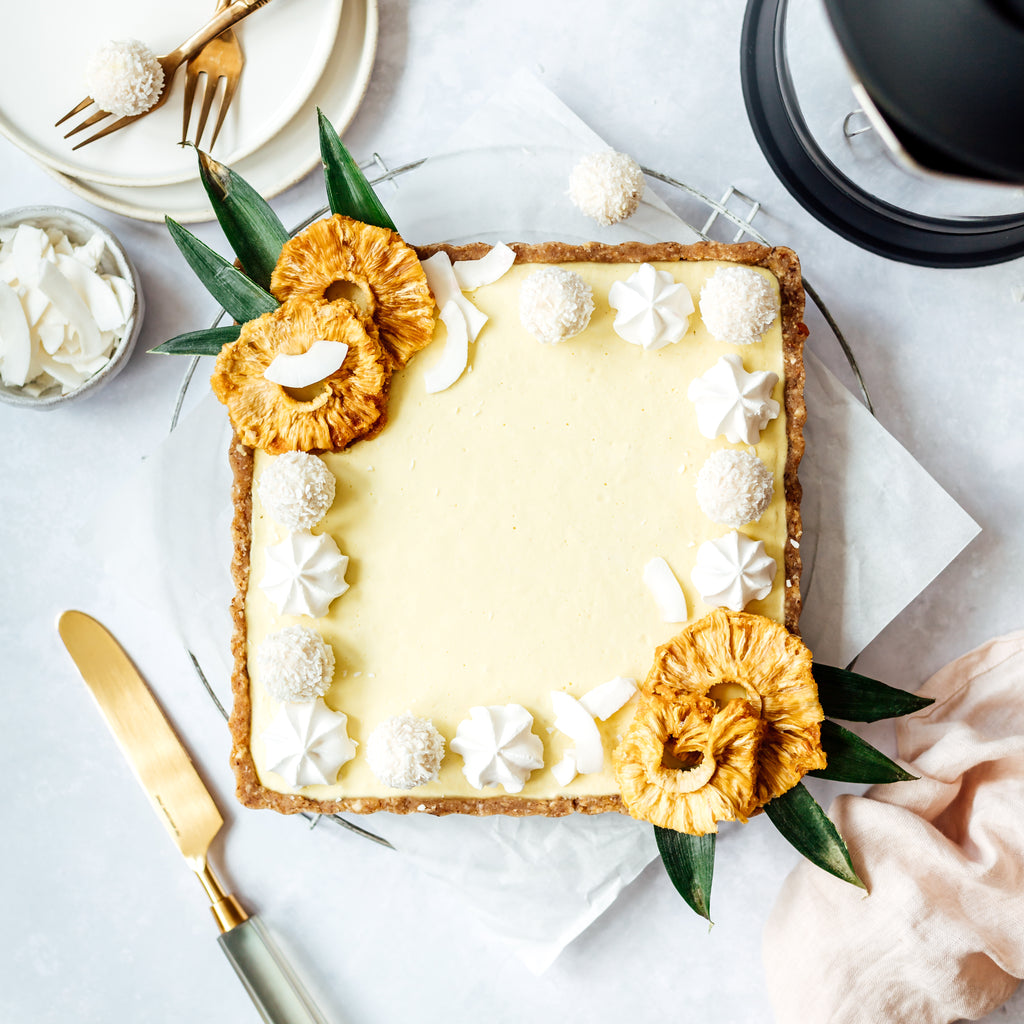
Piña Colada Ice Cream Tart
Summer is here and we have a fun tart recipe for you. Use your leftover pulp to create this no-bake Piña Colada tart. It’s raw, vegan, gluten free and melts like ice cream in your mouth.
PREP TIME: 50 MINS
SERVINGS: 9

Instructions
- Crust:
- 1. Soak the cashews (for the coconut and pineapple layer) for 3 hours in cold water (or for 1/2 hour in boiling water). Use two separate bowls for the different layers.
- 2. Add almonds and cashews to your food processor/high speed blender and pulse - just for 1-2 seconds - to get smaller pieces.
- 3. Add drained (!) almond pulp, shredded coconut, rolled oats, coconut oil, pitted dates, agave syrup, lemon/lime peel, and salt and process until you get a moist crumbly mixture. Scrape down the sides to help the dough to come together. If the dough is too wet, add a few more tablespoons of oats.
- 4. Carefully press the dough into the tart pan. Don’t forget to press up on the sides as well. If you have leftover dough, you can snack on it raw (just like bliss balls!)
- 5. Store the crust in the freezer while preparing the first filling layer.
- Filling:
- 1. For the COCONUT LAYER drain the cashews and blend them together with the other ingredients until smooth and creamy.
- 2. Pour into the prepared crust and smooth it down with a spoon or spatula.
- 3. Store in the freezer for at least 1 hour or until the coconut layer has firmed up. This way, it is set before adding the second layer, which makes pretty layers overall!
- 4. Meanwhile prepare the PINEAPPLE LAYER blending all ingredients until smooth and creamy. Carefully pour the filling onto the frozen coconut layer.
- 5. Put the tart back into the freezer for at least 4 hours, preferably overnight.
- Decorate:
- 1. Decorate with homemade Almond Cow Coconut Truffles, vegan meringue drops (optional), dried pineapple, fresh pineapple leaves and cocktail umbrellas.
- Serve:
- 1. Enjoy! Store leftovers in the freezer.
- Notes:
- Instead of being baked in an oven, a raw vegan tart gets frozen in your freezer.
- You can’t eat it straight from the freezer. The tart has to defrost for a while before you can take it out of the tart pan and cut it into slices/squares with a sharp knife.
- The best consistency to serve it is when the tart melts in your mouth like ice cream.
Ingredients
- Crust
- ¾ cup almonds
- ½ cup cashews
- ¾ cup shredded coconut
- ⅓ cup oats, gluten-free
- ⅓ (packed) cup dates, pitted
- ¼ cup almond pulp, well drained (from almond milk)
- 3 tbsp coconut oil, melted
- 1 tbsp agave syrup (sub with maple syrup)
- 1 tsp organic lime or lemon peel
- pinch of salt
- Coconut Layer
- 1 cup coconut cream (*the solid part of 1-2 cans of full fat coconut milk stored in the fridge overnight
- ½ cup cashews, soaked + drained
- ½ cup shredded coconut
- ¼ cup agave syrup (sub with maple syrup)
- 4 tbsp coconut oil, melted
- juice of 1/2 lime
- Pineapple Layer
- 1 ⅓ cups (8.8oz/250g) fresh & ripe pineapple, cut into small pieces
- ¾ cup cashews, soaked + drained
- ¼ cup coconut cream* (see explanation above)
- 3-4 tbsp agave syrup (sub with maple syrup)
- 4 tbsp coconut oil, melted
- ¼ tsp turmeric powder (to add color)
- Decoration
- Coconut Truffles
- vegan meringue drops (optional)
- dried pineapple rings
- fresh pineapple leaves
- cocktail umbrellas


